Showing posts with label sewing. Show all posts

Tuesday, March 5, 2013

DIY Fabric Pennant Banner

My relationship with sewing is a very chicken and the egg situation. Do I struggle with sewing because it's hard or is it hard because I don't practice enough? It's difficult to say, but I can tell you that making these four pennant banners was quite a struggle. Most of the blame belongs with my machine, which was being particularly temperamental, but there is always user error to consider. I'm here to tell you, though, that persistence pays off.
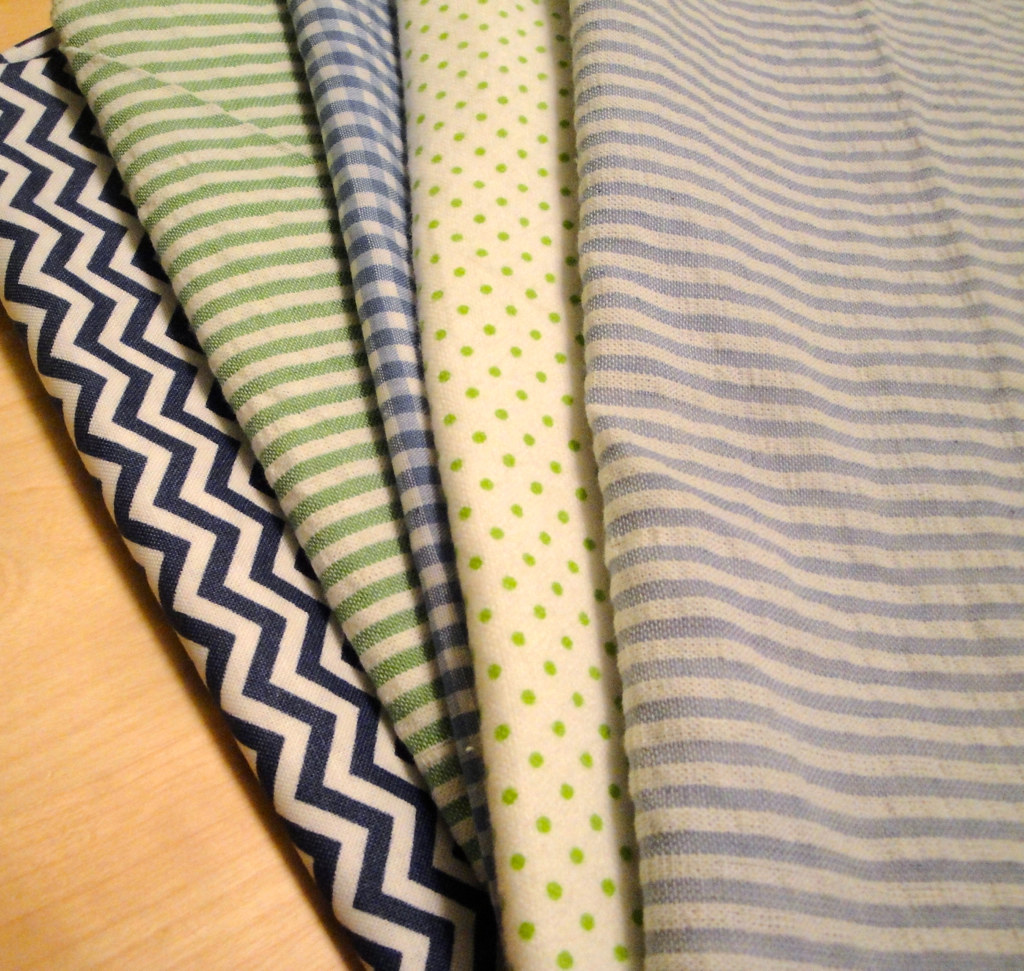
I used this tutorial, which was really great. I made a couple tweaks, which you'll see. I bought fabric at Joann's, most of it from remnants. If you get about a half-yard of five types of fabric, you'll end up with enough triangle pennants to make four banners.
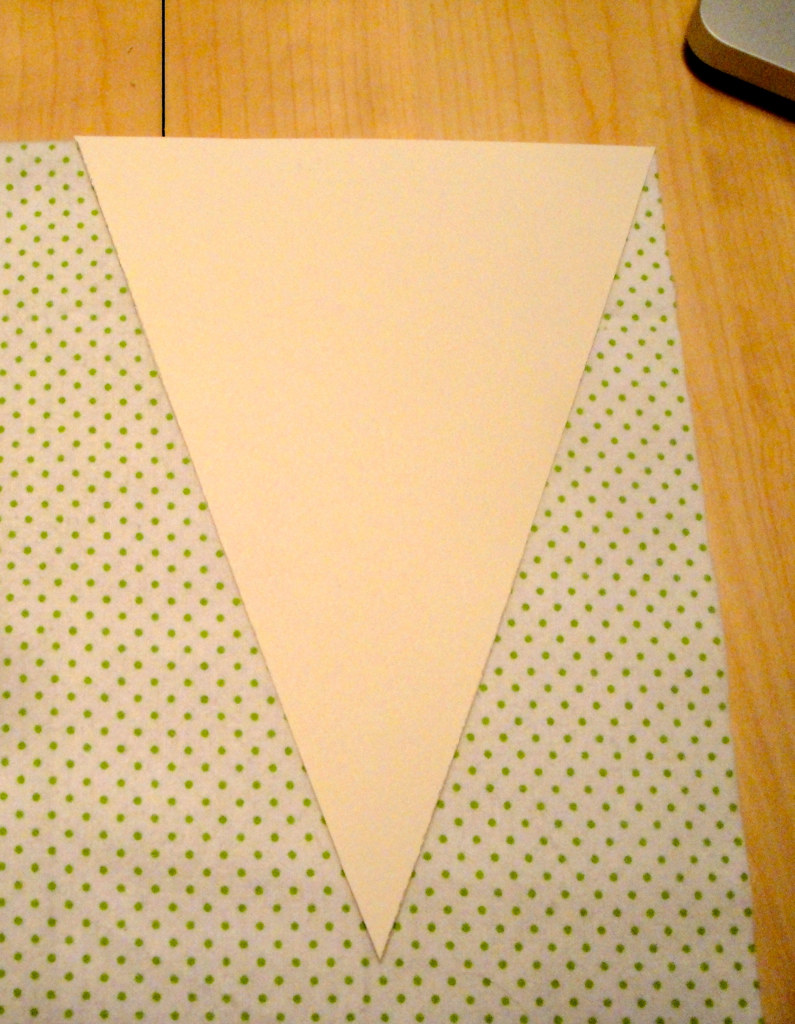
I grabbed a piece of cardstock and, using a ruler, measured 7 inches across the top and approximately 9 inches to the bottom point. I cut the template out and then used it to lightly trace the shape with pencil on my fabric. I didn't have a rotary cutter, so I used scissors, but you can use a rotary cutter. I won't lie...this is pretty tedious work. But in the grand scheme of things, you can do it while watching 2 1/2 episodes of "Scandal."

Ultimately I had a stack of about 48 triangles (a  few got tangled in the machine and had to be sacrificed). I then sewed the sides (not the tops) of each pennant, then pinned them side-by-side to double-fold bias tape, leaving 12 inches of slack on each side. Double-fold bias tape has a long side and a short side; be sure to put the short side in front. 

Once pinned, I sewed the tape from end to end and — voila! — I had pennants.

Tuesday, October 23, 2012

Domestication Update: Buttons be Damned!

When I started this blog, it was to document my forays into becoming something like a wife, rather than the bachelorette/feral cat I had been for most of my life. I'm happy to report that I've progressed from a real fear of raw meat to making meatloaf, and from a I'll-buy-new-underwear-to-avoid-laundry situation to a regular laundry schedule. Heck, I even put my laundry away!

But all that progress came to a head last week when I was reminded just how far I have to go. I was brought to my knees when I realized ... drumroll, please ... I still don't really know the right way to sew a button.

This is a shank button. Instead of having two or four holes, it just has a loop in the back. This makes it inherently a little flopsy, and the likelihood it will fall off (especially if sewn on by tiny Malaysian children) is high.

My hubby was in a rush the other day and had to dress nice. You can imagine my panic when one of his buttons popped off and I had to frantically fix the problem. I realized, HOLY CRAP. I still don't know how to sew on buttons! 

Obviously, I get the basic idea, but I never know how to knot it or how to tie off or how to be sure it's really on there for good. I ran around like a chicken with my head cut off, hunting down my Martha Stewart Encyclopedia of Sewing and dammit if that bitch didn't even have a paragraph about sewing buttons by hand! I think she thinks I'm supposed to know this stuff or something?! Sean suggested I YouTube it and I waved away his suggestion, muttering, "No time! NO TIME!"

Long story short, I frantically just started sewing, got that bad boy back on the jacket and managed to get my husband out the door without looking like he was a laid off bank executive living in a Hooverville.

It was a good reminder that despite all the progress I've made, I still have lessons to learn. Oh, and if you're curious, here's how you sew a shank button:


The good news is, that's close to what I did, operating purely by instinct. Whew!

Monday, March 5, 2012

Weekend: Skirt Sewing and Mochi

This past weekend was another busy one of hosting an out-of-town friend, this time my high school pal/bridesmaid Sarah, who graciously came to teach me how to read a pattern!

I must be honest; I don't think this blog could possibly become a learn-to-sew blog because a) i have no idea what I'm doing and b) it's hard to remember to take pictures when you're learning to sew!

In lieu of great shots of our sewing adventures, here's some shots from the weekend:

On Friday, I read Dr. Seuss books to kindergartners...perfect excuse to wear my new red pants from Gap.

On Saturday, Sarah and I headed to Joann's to pick out some fabric to make a skirt, using a Simplicity pattern my mom gave me. We were really tempted to buy this ridiculous man candy fabric...

But ultimately went with a kelly green cotton. The skirt, unfortunately, is about an inch too small in the waist for me (motivation perhaps?), but we could get it to zip at least. Sarah also incredibly generously gifted me with Martha's Encyclopedia of Sewing...I'm so excited that I've actually added another skill (very, very rudimentary mind you) to my oeuvre!

I also introduced Sarah to mochi ice cream. Have you ever had mochi ice cream? It's ice cream wrapped in a chewy, puffy rice cake. It's so weird and yet so delicous and fun. I always buy it at Trader Joe's.

How was your weekend? I have an extremely busy week ahead, full of meetings and such, but I hope I'll have some time to breathe and hopefully update this here blog some more.

Monday, January 23, 2012

How to Sew a Pillow, the Inexperienced Way

As you know, I recently tackled my first sewing project — a lumbar pillow. Now, I want to take you, my reader, with me on this journey of sewing, but I want to be clear: I don't know what the hell I'm doing. So me giving advice is pretty silly, but hey, maybe one of you has no clue where to start and the other 5,000 online tutorials were no help! Join me on my sewing odyssey...

 So first off, I laid out the fabric and placed my pillow on top of it, just to get an idea of what part of the pattern I wanted to be on the front of the pillow. Once I chose a section, I measured an inch around the edge of where my pillow had been. I don't think this is the way people normally do it, but I had no idea what to do.

Using that piece as a template, I cut out a second identical piece, making sure that piece would make a nice backside.

 The zipper I bought was too long and I had no idea how to rectify that, but I looked on the Internets and they told me to sew a whipstitch (youtube it if you don't know what that is...I did the same thing) to create a new stop. Once the stitch was in place, I just snipped off the rest of the zipper.

 On each piece of fabric, I ironed about an inch of the top of the fabric, then sat down to sew my first stitches.

 I set the machine to straight stitch, and went for it. I sewed slow and steady, but I still wavered enough that my lines were not straight. Story of my life.

 Once I had sewed the ironed sides, I pinned one side of my zipper to the hemmed part, with the zipper facing the good side of the fabric. I then sewed another line to attach the zipper, and then did the same to the other side.

 Once one side was done, it looked like this. Those hemmed sides help hide the zipper a bit, and make it look more finished.

And this is how the zipper looked when it was done. So, sew each side inside out. After I sewed each side, I would put the pillow in to see how I was doing and whether any sides of the fabric needed to be trimmed.

I was very excited to sew the last side and then — oops — realized I had sewed all four sides without leaving an opening for my pillow! Rookie mistake! Thank god for the zipper...I was able to shimmy it down enough to open that side of the pillowcase and stick in the pillow form.

All told, the supplies cost:
Fabric: $35
Pillow form + zipper: $17
Total: $52, compared to this one, which goes for $100. To be fair, it has cording and a different backside. But STILL.

And in time, it probably took 3 hours of work, and that was a lot of scratching my head and pondering things. Hopefully my next pillow goes even quicker!

Friday, January 6, 2012

First Sewing Project Decided!

After much debate (okay...two nights of debate), I think I've decided what will be my first sewing adventure. I'm going to sew a ... lumbar pillow!

I like the idea of using a less expected shape for a pop of busier or brighter or different fabric, like this large one seen here.

Isn't it kind of fun to have that long line? Another one seen via CKM Interiors.

And it can really bring in a fun snazzy pop of color, like this one, via Daily Tarte.

Or it could tie the whole room together in one long swath, like in this room by Caitlin Creer, seen here.

So I spent the night searching for a fabric that would tie my crazy living room together, somehow bringing harmony to my green ikat and seafoam chevron pillows and zebra rug (which I'm kind of over, by the way). I think I found a couple candidates, so I'm excited to order some fabric and go to town.

Tuesday, January 3, 2012

Sewing: The Next Frontier


Longtime readers of this blog know that I'm not the kind of person who took home ec. Although I was probably the perfect candidate for the course, I scoffed at it because I thought I was going to be a working woman who was unconcerned with domestic matters. HA! Who did I think I was? First of all, cooking, cleaning and sewing are way more complicated than almost anything I do in my professional career and second of all, they're skills that enable you to save more of that hard-earned cash. Plus, how crucial was it that I use one of my elective credits on an upper level math elective that almost killed my GPA?

Two years ago, I started this blog as a way to document my efforts to learn to cook and was stunned when, in about the span of two months, I had basically learned how to cook. There are still plenty of challenges I haven't tackled yet, but I get the basic gist.

So I thought it was time to move on to another skill that eludes me: sewing. Sewing is so technical and demands so much skill and focus that it actually scares me. But I went ahead and asked for a sewing machine for Christmas, and received the one you see above: the Singer Heavy Duty machine.

On Sunday, I took the machine out of its box and put it together. I was actually laughing to keep from crying when it took me the better part of two hours to properly thread the machine. I don't expect to become an expert seamstress, and I'm pretty sure there are many blogs that explain sewing WAY BETTER than I ever could, but I do want to document some of the projects I tackle as I go.

So far: I've learned how to sew a buttonhole...kind of. I'm still not sure I'm using that feature correctly.

I hope you'll all speak up and give your best advice, share tutorials that have helped you and just generally be the supportive friends I'll need in this endeavor!